If we intend to reproduce plants by means of cloning, we must first choose the so-called "Mother" plants that will be used to prepare the clones. It is advisable that these varieties are stable and desired by us, so avoid impulsive actions and quick decision-making. After all, we do not want to have just any plants, not being sure whether they will survive, and also waste valuable time. The ideal "mother" is a plant that is vigorous, grows nicely and develops properly.
After selecting the “Mother Plant”
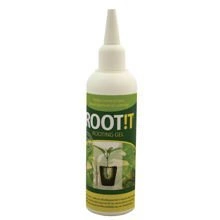
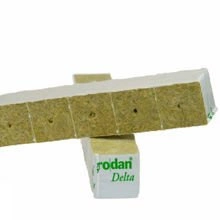
When we manage to choose the plant-like "Mommy", we can move on to the next stage, which is the preparation of tools and fluids. For this we need: - Preparation for rooting cuttings / clones, eg Clonex; ; - medium designed to place small clones, in my case they were mineral wool cubes,,an ideal solution; - a container in which we will soak the previously prepared cubes of mineral wool, as well as water, necessarily with the correct pH (I decided to use pH 6.0); - 96% alcohol, with which we disinfect the tools; - a scalpel, possibly very sharp scissors; - a clean cloth or paper kitchen towels; - a propagator, i.e. a device in which plants will take root, it is important to maintain appropriate climatic conditions; - a container for the liquid, assuming, of course, that it is not included with the Preparation (if there is, there is no need to use an additional one); - Perlite, the popular white "pebbles" - it is worth using them, although there is no such necessity; - proper lighting, which will ensure proper development for small plants, in my case a 4 x 54W T5 lamp (light color 6400k) was used.
Proper cloning
If we have all the materials we need (can be prepared on the basis of a predetermined list, we will be sure that we will not forget anything), we can get down to work, i.e. take care of the proper cloning.
The first thing we should do is sincerely apologize to our potential "Mothers" for knowingly harming them :)But let's hope that they will not take offense too much and forgive us the pain inflicted, and thus will continue to serve us, providing another, equally wonderful clone-children.First, we soak the wool cubes in water with a suitable pH - in my case it was pH 6.0 and I believe that this is the optimal value, but if it is a similar value, nothing bad will happen. The soaking can be started 24 hours in advance, although it is not a necessary requirement. At least I think so.
Soaking clone cubes
After soaking, the cubes have the right weight, you can remove the container and let the water drain slowly. This is where Perlite comes in - I personally use it to maintain adequate humidity, in addition, this agent acts as an insulator from the ground, and protects against excess water in the Propagator's "litter box". It also provides free air access to the rootlets, which is very important. Thanks to Perlite, excess water does not run away, while ensuring adequate humidity in the room where the plants are located. A cube of wool with prepared holes filled with the Rooting Agent.
Proper cloning
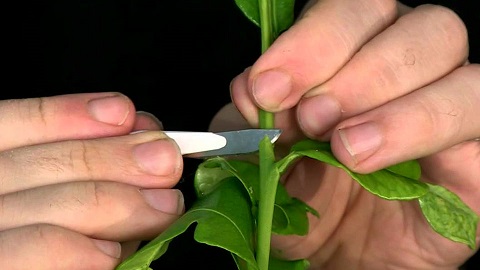
We need to make the holes ourselves, they should be about 3 cm deep, then we fill them with a small amount of rooting agent, making movements similar to lubrication. When we have the substrate prepared in this way, we can collect the first clone from the previously selected "Mother". However, before we start cutting, it is necessary to thoroughly disinfect the scissors or scalpel, which we will use to cut the seedling. It is an activity that does not need to be described in detail, everyone knows exactly what to do. After disinfection, we can safely separate the first branch from the "Mother", it is important to cut off the regrowth at an angle of 45 degrees, but you do not have to measure it, the task can be done "by eye". I decided to take clones from the bottom of the plant.
Preparation of clones for replanting
When the first little plant has been cut off, we need to prepare it for placing in the medium. Cut off the larger leaves, i.e. suckers, which will probably turn out to be unnecessary, leaving the amount of leaves necessary for further growth. You should have a rooting preparation prepared in advance in the pot and gently dip the cut end of the plant into it. The consistency of the preparation should be gel-like, thanks to which it adheres perfectly to the plant. The seedling should be left in the gel for about 5 minutes, and during this time you can prepare for the collection of the next regrowth.
Putting the clones into the propagator
When our clone is ready to plant it in a mineral wool cube , put it in the Propagator, on a fluffy Perlite substrate. It is necessary to provide adequate lighting - the function of the sun in this case will be performed by a 4 x 54W T5 (6400k) fluorescent lamp, set in the 18/6 system, i.e. eighteen hours of the day and six nights. Of course, there are no obstacles to use slightly less powerful lighting, but it is important that the light color is correct. We cannot forget about the correct humidity, which should be in the range of 90% -95%, at a temperature of 23 degrees C - 26 degrees C - these parameters will allow us to obtain very high results in rooting plants. In the case of less lighting, it is worth investing in a heating mat or a propagator equipped with the mat with a thermostat. There is no such need if the room where the cloned plants are kept has the right temperature, and the lamps additionally increase it. Also, let's not forget that our clones can get stuck for a while, this is quite normal and you shouldn't panic. If all the tasks are done correctly and we put a lot of heart into this work, the roots should appear within a few days, approximately after 5-7 days. It is difficult to predict how many plants will root properly, but it can be assumed that the result will be around 90%.