How to choose and connect HPS / MH lighting

How to choose and connect HPS / MH lighting
HPS lighting is still the most frequently chosen type of lighting for plants. When deciding to grow under this type of light, you should remember about a few disadvantages that are associated with it:
-High temperature (requires much more efficient ventilation)
- bulb consumption (each bulb can be used for a maximum of 2 years)
-High electricity consumption
-Low light absorption by the plant
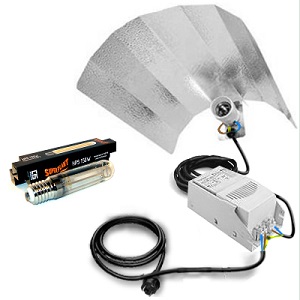
To start growing with HPS or MH lighting, you will need 3 basic components:
- HPS / MH bulb
-HPS / MH power supply (magnetic or electronic - more on this later in the article)
- Reflector + socket / socket E40
HPS / MH bulb
One of the key decisions when completing a kit is choosing the right bulb. First, you need to decide on the power that will be appropriate for your growing area.
|
Bulb power |
Optimal illuminated surface |
Optimal height of light placement |
|
150W |
0,15 - 0,35 m^2 |
10-12cm |
|
250W |
0,5 m^2 |
17-22cm |
|
400W |
0,8 -1,0 m^2 |
30-40cm |
|
600W |
1,0 - 1,15 m^2 |
50-70cm |
|
1000W |
1,15 - 1,5 m^2 |
80-90cm |
Remember that when deciding on a given bulb power, you must match the power supply and reflector to it.
To choose a light bulb that will provide the most efficient work possible, pay attention to two parameters: the light spectrum and the number of lumens. As you can guess, the higher the number of lumens, the better the results you can expect. When checking the light spectrum, you should pay attention to the two light length ranges: 420 - 480 nm (blue light) supports vegetative development and 610-690 nm (red light) is responsible for the flowering period. Depending on the purpose of the bulb / plant life span, you need to choose one that has the appropriate values for the above-mentioned ranges.
ATTENTION ! never compare HPS lighting to LED in terms of the amount of lumens. LED lighting has a lower number of lumens, but the degree of light absorption is many times higher, so using LED lighting you can achieve the same or better effects with much lower energy consumption.
HPS / MH power supply
To start the HPS bulb, you need a so-called power supply. ballast / ballast. The power supply is equipped with a fuse, a choke coil and a capacitor. The igniter, also known as the starter, transmits an electrical impulse that activates the bulb and makes it glow.
We can distinguish two types of power supplies:
Magnetic
-High working temperature
-Faster bulb wear
-More failure rate
-the need to connect the wires on your own (in most cases)
-Higher electricity consumption
Electronic
-Low working temperature
-Extended bulb life (thanks to electronic ignition)
-Possibility to connect both HPS and MH bulbs
-Reliable performance
Reflector with bulb socket
To achieve the best results, it is advisable to use a reflector of an appropriate size. The higher the power of the bulb, the larger the reflector you should use, remember that the larger the reflector also means more even light distribution.
As you know, HPS bulbs emit light in all directions. Using a reflector, we can direct the light beam towards plants. Which greatly improves the lighting efficiency. Most reflectors maintain a reflectivity level of around 80%, but you can find reflectors on the market with a reflectivity level of up to 95%.
Connecting the HPS power supply
To properly set up the whole set, first you need to connect the power supply, you can find the following types of power supplies:
1) Power supply without any wiring
If you have this type of power supply, most likely you are dealing with a magnetic power supply. To properly connect the power supply, see the description on the power supply. In most cases, the pair of holes marked "F" and "N" should be connected with the cable going to the electrical outlet, while the pair of holes where the cable should be connected to the bulb are marked "LR" and "LA".
2) Power adapter with two plugs
Power supplies of this type are found both among magnetic and electronic power supplies.
Connecting them is much simpler than in the case of the power supply described above.
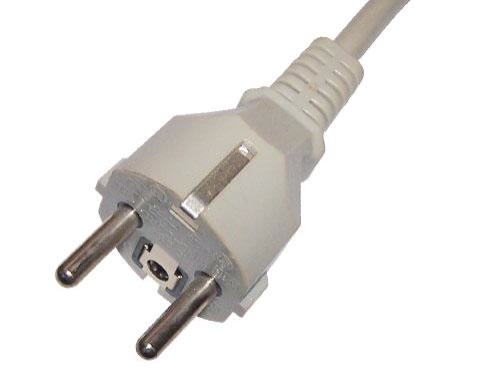
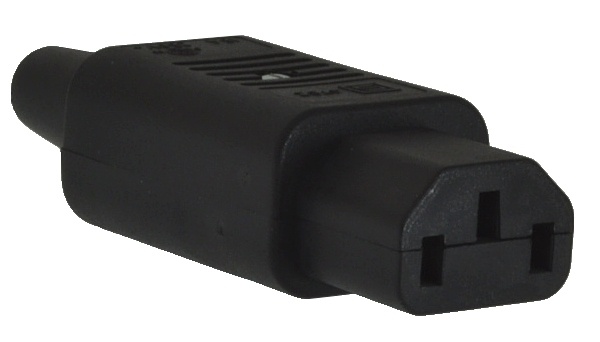
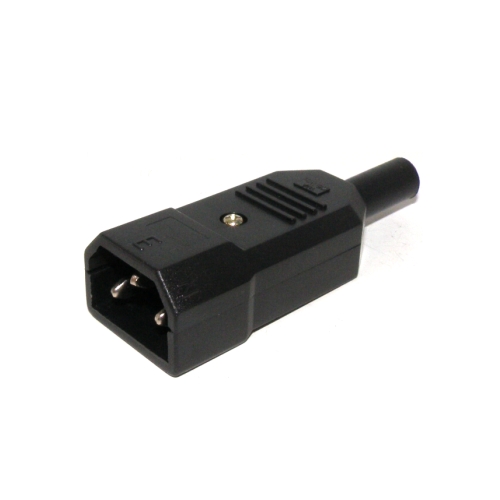
Plug (male) No. 1 is connected to an electrical socket, while plug No. 2 is connected to the reflector (when choosing this power supply, we must pay attention to whether our reflector is terminated with the appropriate plug No. 3)
no.1 no.2 no.3
Remember that you can only connect one bulb to one power supply!
Connecting the reflector of the HPS socket
Connecting the socket is a relatively simple task, all sockets have two terminals for the neutral wire and the phase (which cable we connect to which terminal is irrelevant). Remember that some cable clamps are tightened from the inside (from the side where the bulb is screwed in). Also pay attention to whether the other end of the cable you twist will be compatible with the power supply.


